In this tutorial, it will show you the processes of creating a realistic clouds text effect in Photoshop. It will use any bold font, combine it with textured clouds brushes. We will also create beautiful Earth Day poster photo manipulation. You may get .psd* file of "Earth Day Clouds Text Effect." Photoshop tutorial by making a payment . Put the tutorial title in "Add special instructions to seller" line of PayPal and it will be sent to you shortly.
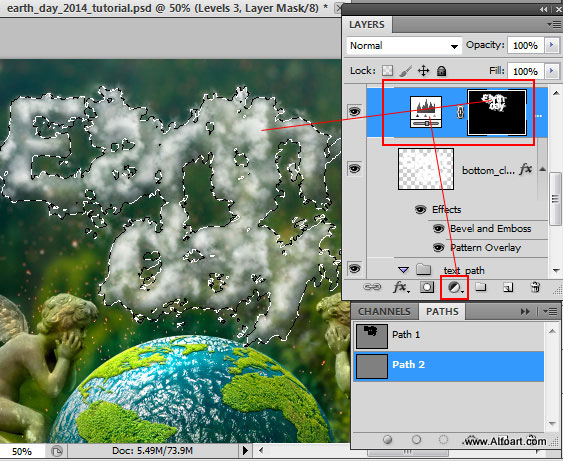
- Load selection for the created clouds text shape, then create Adjustment Levels layer. You should get Adjustment layer mask like on the screen shot below automatically.
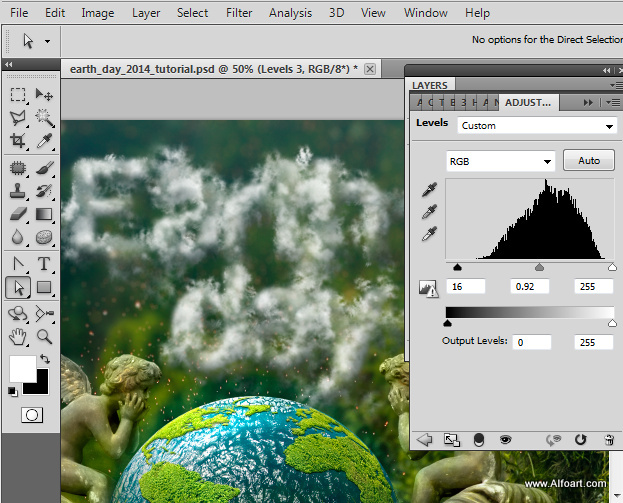
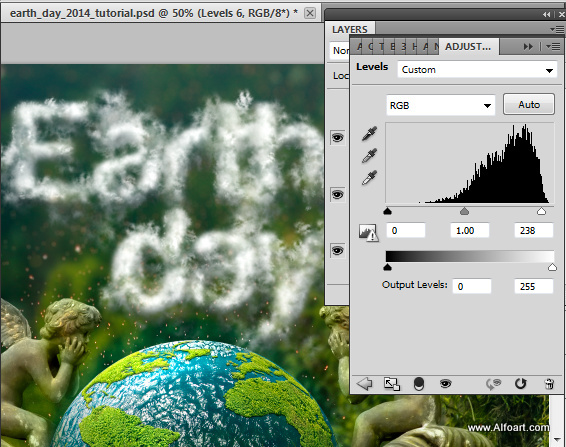
- Set adjustments layer using settings from screen shot below(play with levels settings if you use different background for the clouds):
- Create a new empty layer again, make active text path as well.
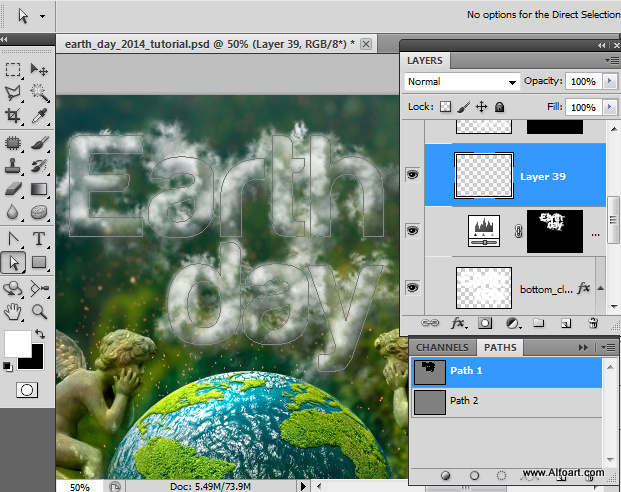
- Make active Brush Tool, choose another clouds brush "top-cloud" 150px size.
- Then take "Direct Selection tool"
 to apply stroke to the path as previously. Right click to path, choose "Stroke Path".
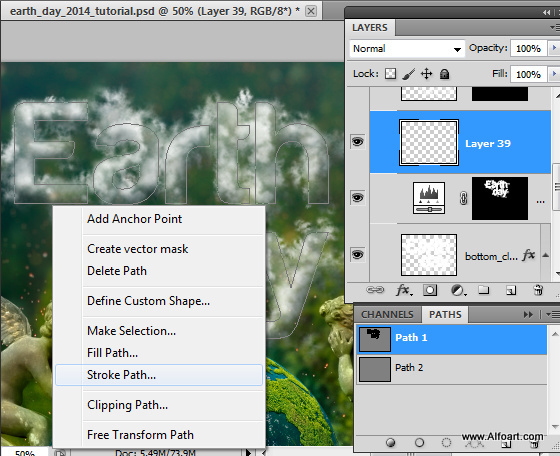
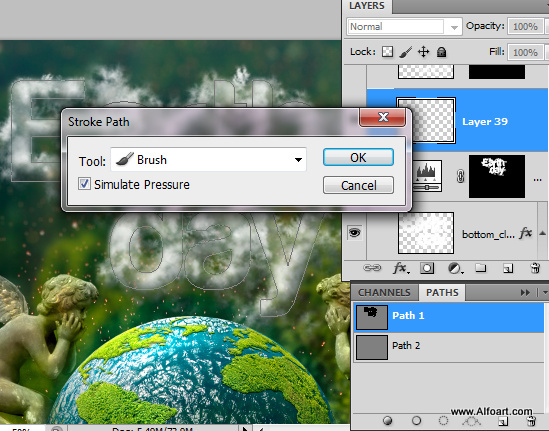
- You will get new clouds texture layer, little bit different then the previous one, because of brush settings.
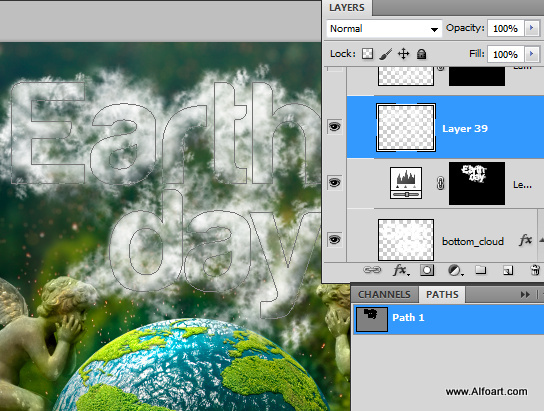
- Load selection for the original text layer(do not make it visible, just Ctrl + click text layer thumbnail).
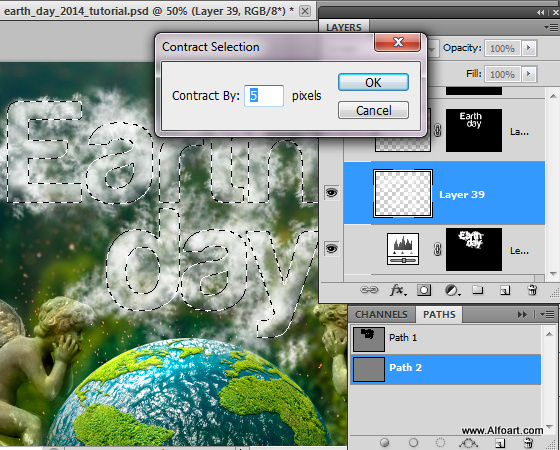
- Go to Select > Modify > Contract.
- Go to Select again > Modify > Feather Radius (5px).
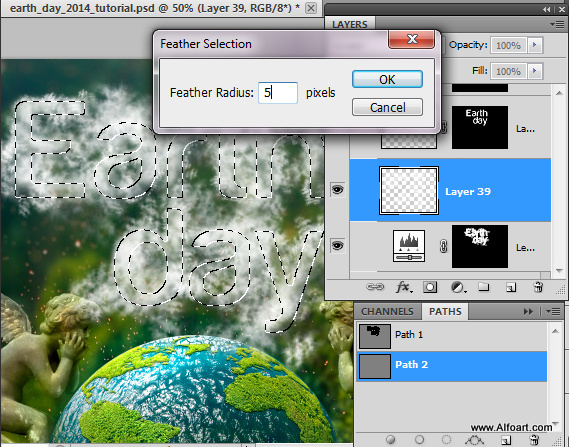
- Keep modified selection and add Layer Mask to the new clouds texture layer. This action should leave visible only inside clouds texture for the new clouds layer and as a result make clouds text more readable/prominent.
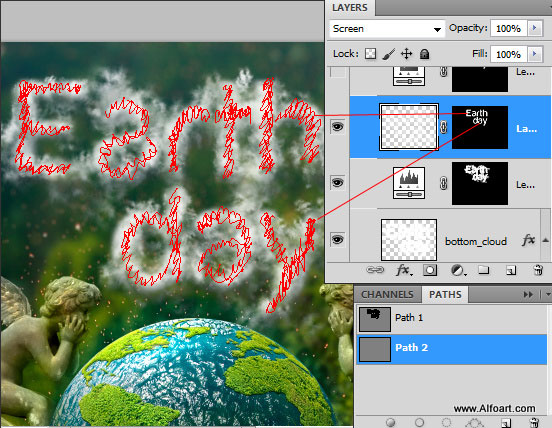
- Load selection for the second clouds Layer Mask and create Levels Adjustment layer once again.
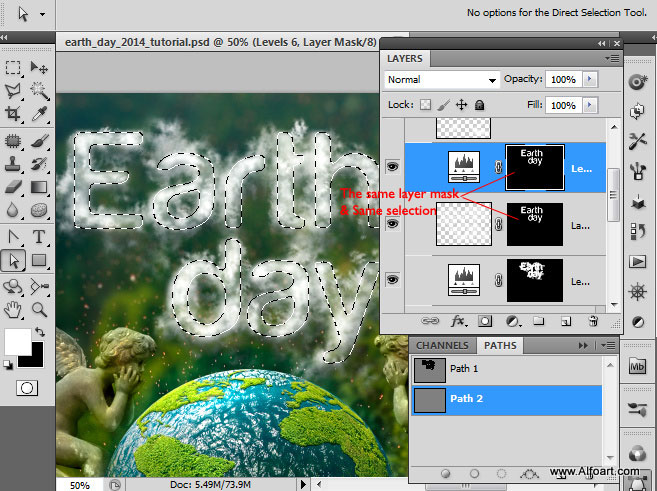
- Here are the settings for the new levels adjustment layer.
- If you need, you may correct and improve clouds text effect.
- Add a new empty layer.
- Take second clouds brush(play with the brush size and other settings) and touch the new layer above the clouds layers where is needed to make text readable/prominent/volume/etc...
- You may see selected and masked spots of the clouds brush after corrections on the screen shots below:
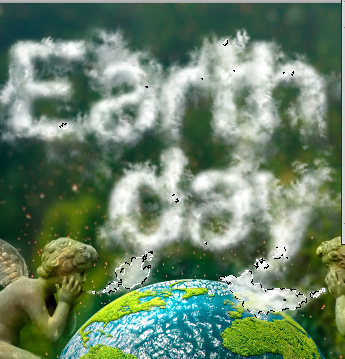
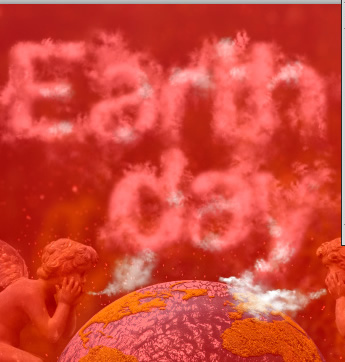
- Here is the additional way to correct clouds text effect:
- Group all clouds text effect layers
- Add Layer Mask to the group
- And touch layer mask with the translucent(~50%) clouds brush to correct text silhouette.
- You may see masked areas with the corrections below:
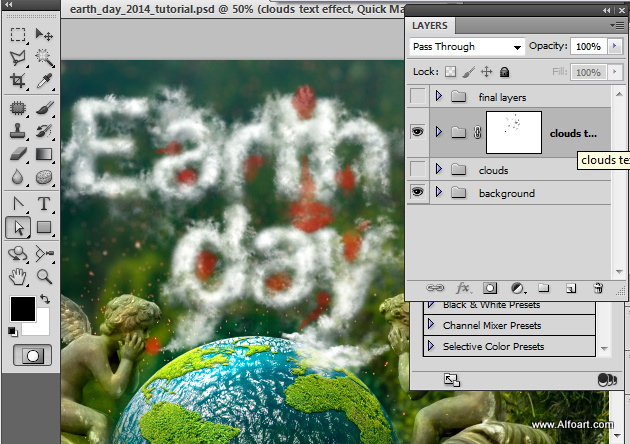
- The clouds text effect is done, but you may add real clouds to the composition.
- Open Clouds image.
- Duplicate background layer, go to Image > Auto Contrast.
- Duplicate corrected layer again.
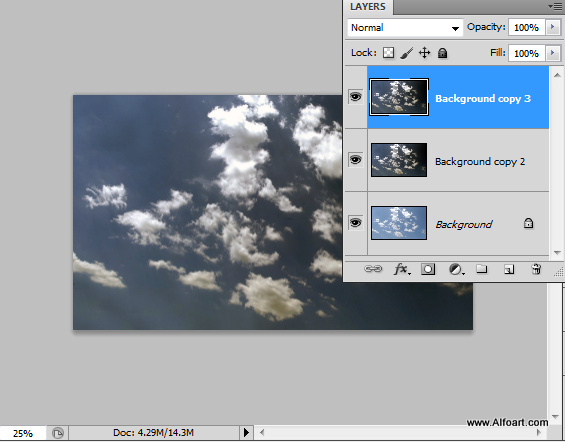
- Make second duplicate Black&White, Image > Adjustments > Black and white.
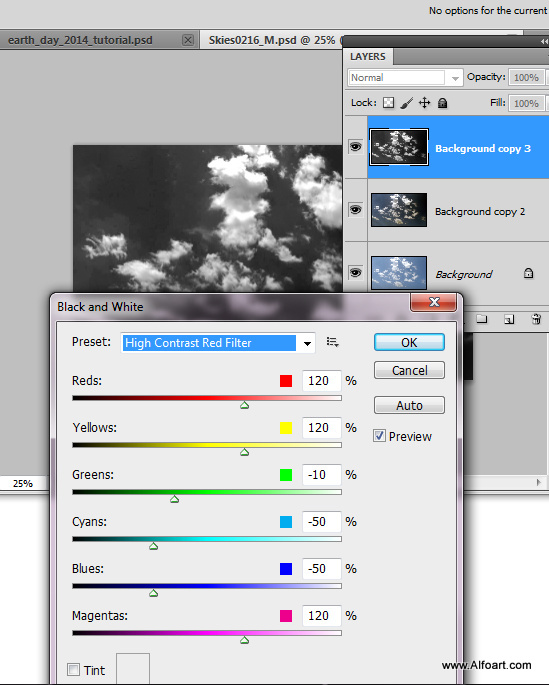
- Open Channels Tab. Duplicate one of the channel.
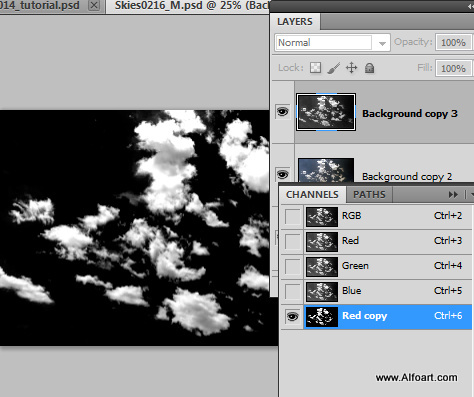
- Correct levels for the duplicated channel.
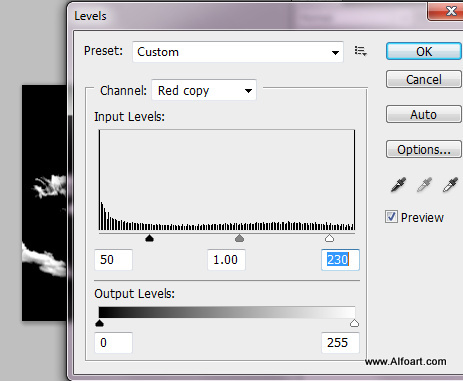
- Ctrl + Click corrected channel thumbnail to load selection for the white clouds. Make active RGB channel.
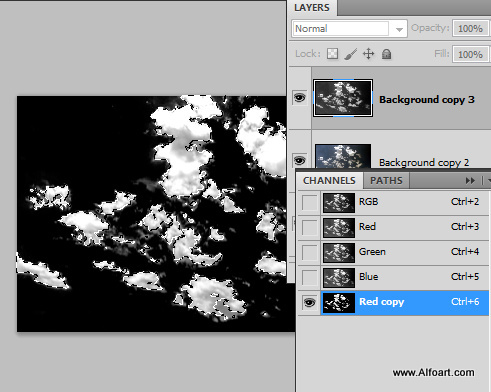
- Return to the layers palette. Keep selection. Remove or make invisible black and white layer.
- Make active auto contrasted layer and copy selected area.
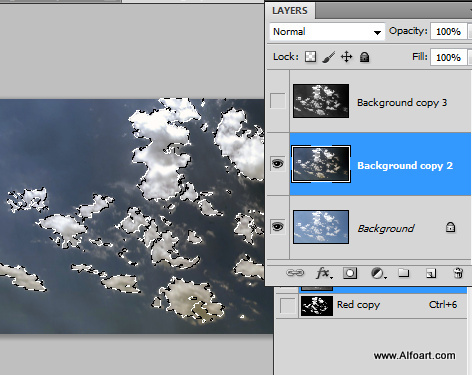
- Paste selected clouds to the "Earth day" composition. Apply Screen Blending Mode to it.
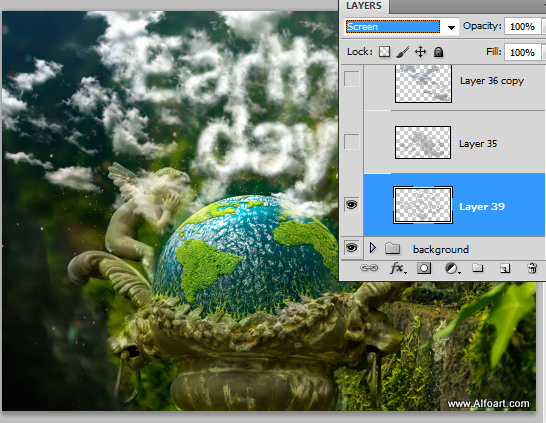
- Select portions of clouds(just choose small croup of clouds and select it around with the Polygonal Lasso tool).
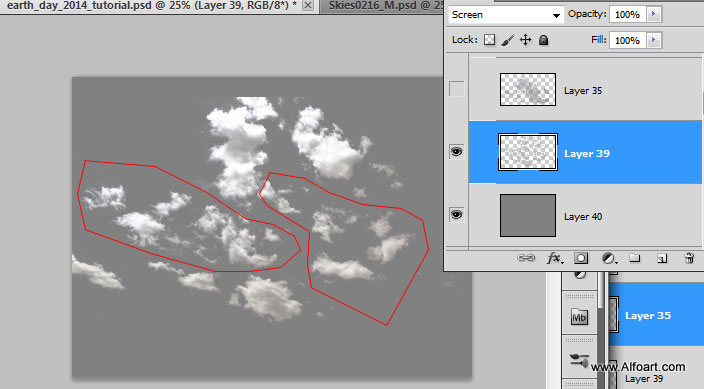
- Paste them into the new layers, move them to get better position and composition, apply Screen Blending Mode to the parts of clouds as well.
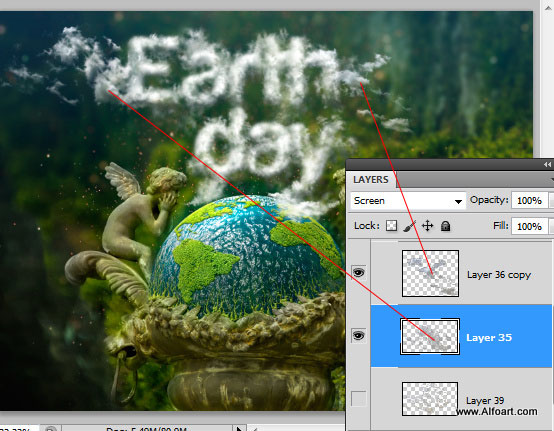
- Finally you may merge all layers.
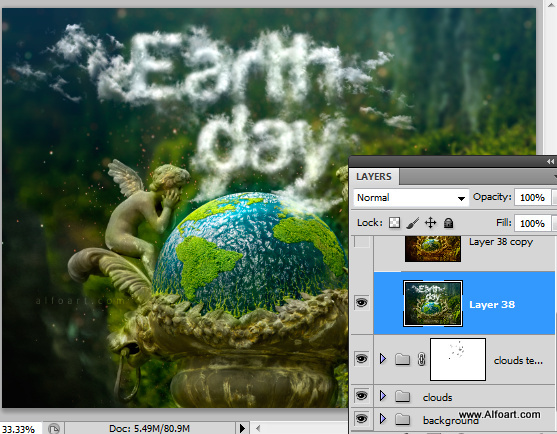
- Duplicate merged layer.
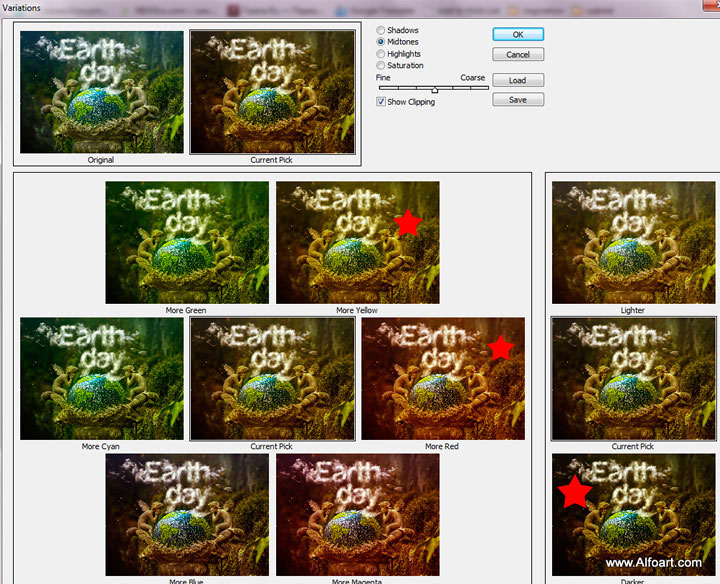
- Go to Image > Adjustments > Variations
- Pick marked options:
- Apply "Color" Blending Mode and Opacity 40% to this layer.
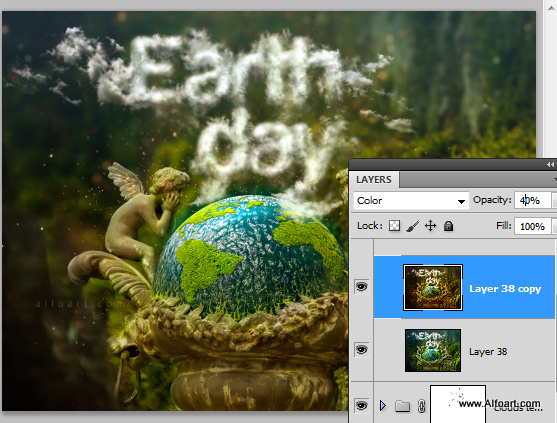
And here is the result!


