This tutorial will show you how to create realistic clouds text effect in Photoshop. In oreder to create clouds effect use bold font, combined with textured clouds brushes. We will also create beautiful Earth Day poster photo manipulation. You may get .psd* file of "Earth Day Clouds Text Effect." Photoshop tutorial by making a payment . Put the tutorial title in "Add special instructions to seller" line of PayPal and it will be sent to you shortly.
- Sky
- Font
- Clouds Brushes
- Clouds Pattern (Adobe Photoshop preset pattern)
- Helpful files - (sphere, bottom grass shapes, map, ice texture)
- Green sphere shape - by javarman3, actually you may use any grass texture instead, just apply Distort > Spherize Filter to it.
- Moss background
- Angels figures
- Lights
Clouds text effect files:
Images for the Earth Day background:
- Download and open "Moss" background image, so the actual size of Photoshop document is 1600px X 1200px, 72px/inch.
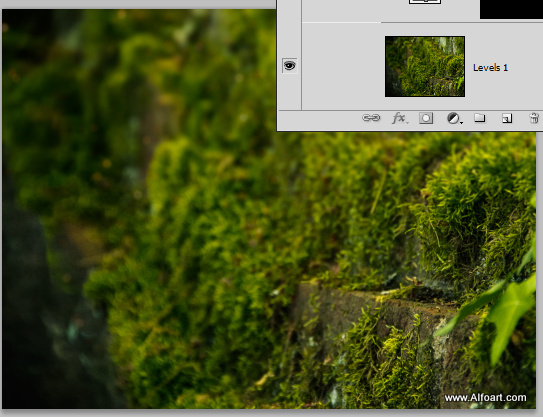
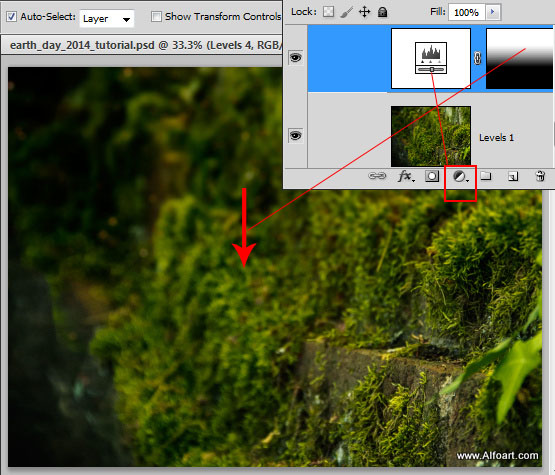
- Create "Levels" adjustment layer, add Layer Mask to adjustment layer and fill it in the center part with the linear Black and White gradient.
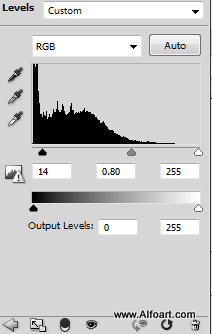
- Here are the settings for the "Levels" adjustment layer.
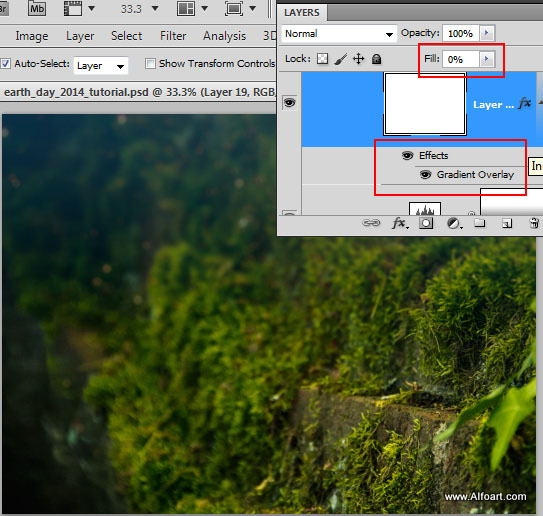
- Create a new layer, fill it with any color, apply Fill = 0%, add Gradient Overlay layer style effect.
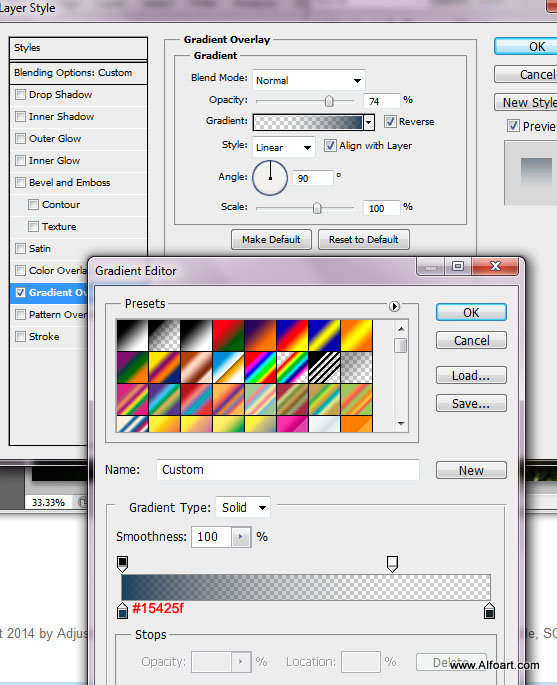
- Use these settings for the gradient effect:
- Then insert lights image(dark background with the fireworks lights). Place this layer on the top of all previous layers.
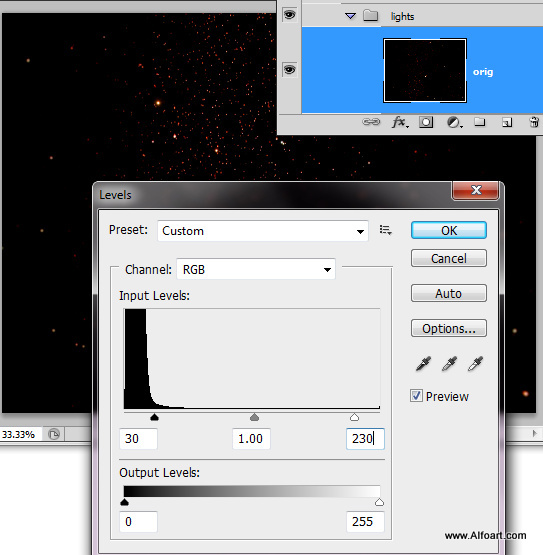
- Correct levels for this image, in order to make dark shade darker and white lighter. Move levels markers to center just like on the screen shot below.
- Activate Quick Mask Mode, then choose black and white linear gradient tool and fill Masked composition with the gradient, you should see the shaded bottom part .
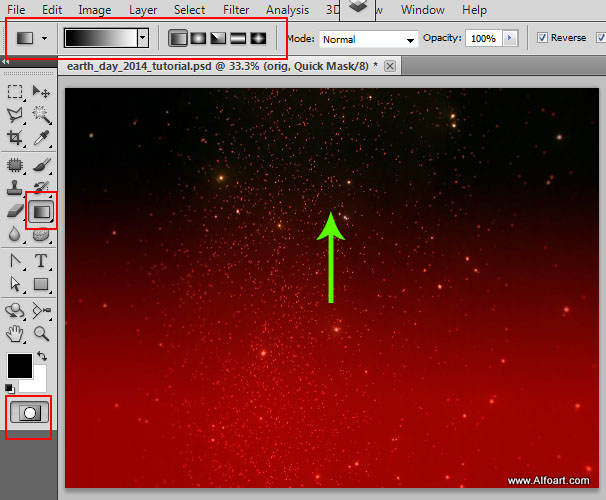
- Release Quick Mask (Click Mask icon once again), you will get top part selection.
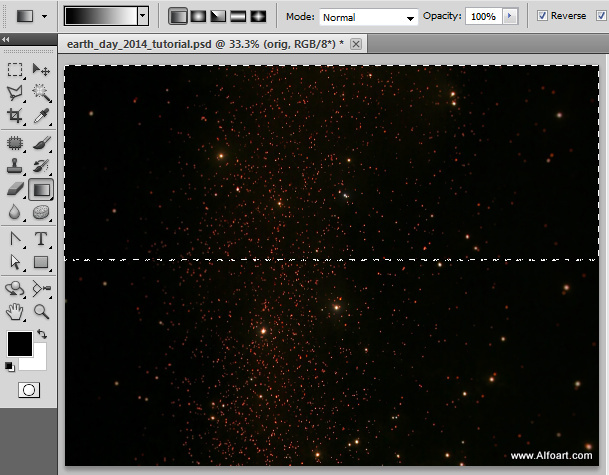
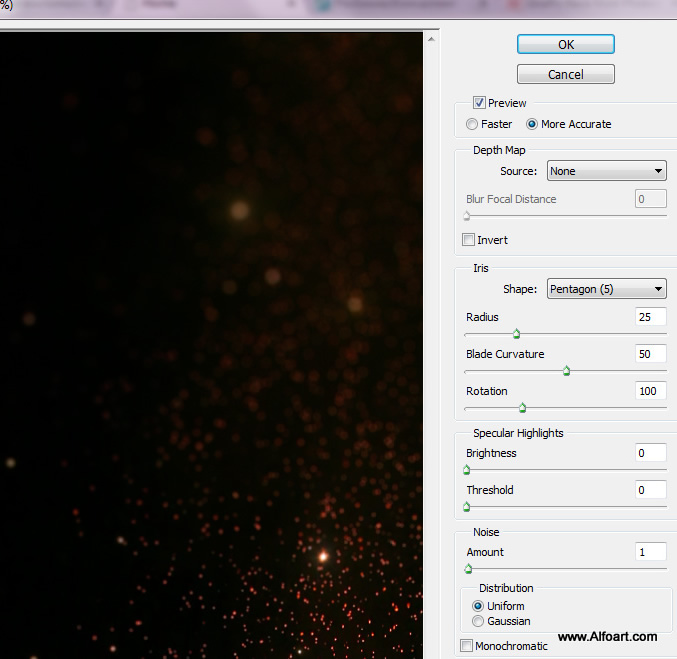
- Go to Filter > Blur > Lens Blur
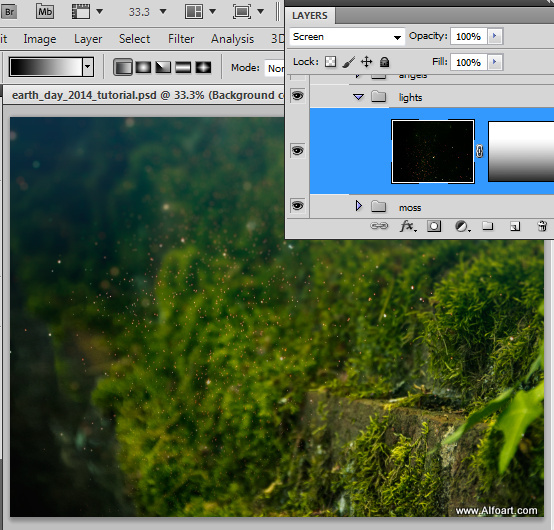
- Apply Screen Blending Mode to this layer. Also you may wash away bottom lights spots with the black&white linear gradient in the Layer Mask.
- Insert angels vase image.
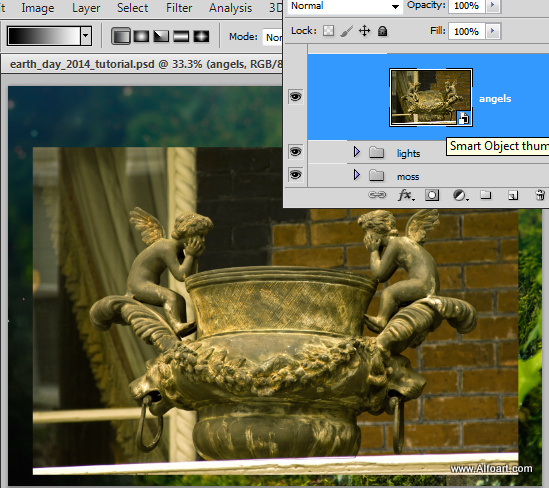
- Select base and angels silhouette (I used simple Polygonal Lasso Tool
 ), inverse selection and remove background.
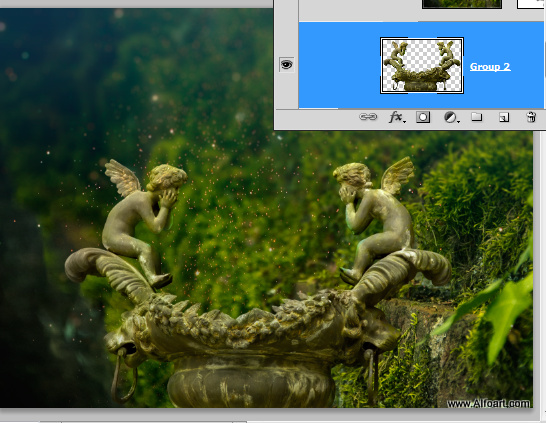
- In order to add background shades to the angels layer do this:
- Make angels layer temporary invisible.
- Go to Select > Select all
- Go to Edit > Copy Merged (you need to copy all background scene).
- Make "angels" layer visible again, Go to Edit > Paste(paste the merged background layer above the angels).
- Merged bg layer should cover the angels. Apply Gaussian blur filter(8px) to the merged background.
- Add layer mask to the merged background layer.
- Load selection for the angelsm (ctrl + click) layer thumbnail.
- Go to Select > Modify > Contract (15-18px).
- Go to Select > Modify > Feather (15).
- Make active "merged background" Layer Mask and fill selected area with the black color.
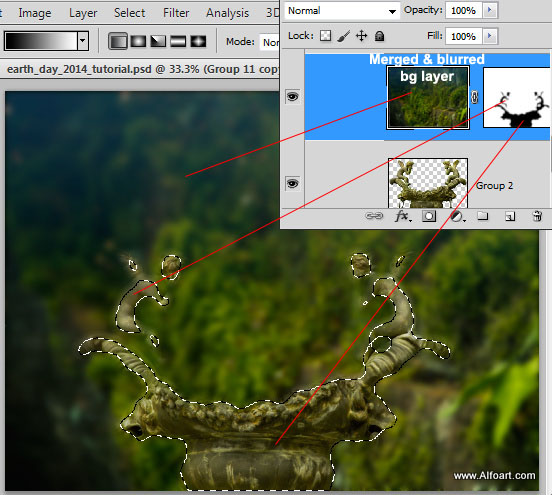
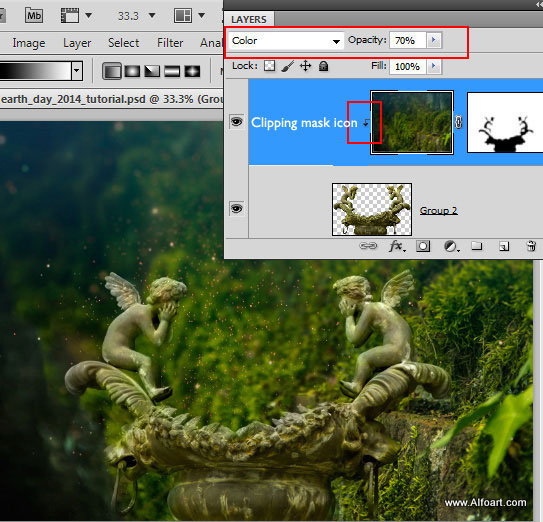
- Apply Color Blending Mode to this layer and Opacity 70%.
- Right Click this layer, choose Create Clipping Mask. In order to apply background shade effect only to angels sculpture you need to convert layer to the Clipping Mask.
- Insert "ocean surface sphere".
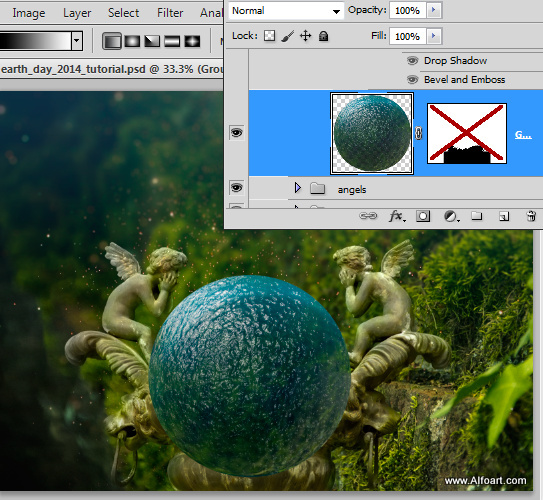
- Add layer mask to this layer. Load selection for the "angels" layer and fill selected area with the black color in the Sphere layer mask. Correct blue sphere silhouette on the left side(to cover angel's leg) with the white brush.
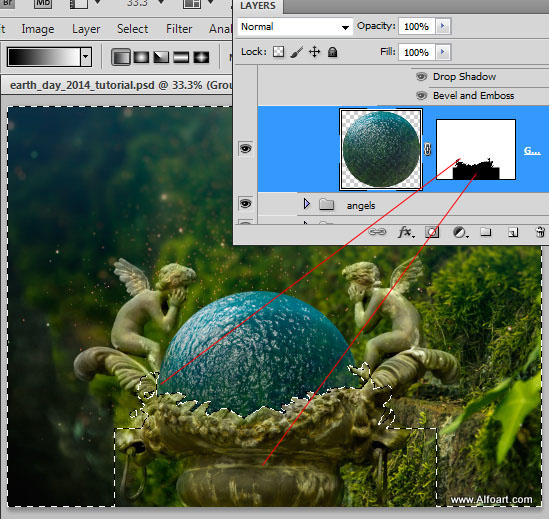
- Inverse Ice texture. Apply Screen Blending Mode to this layer.
- Place Ice layer above the blue sphere, create Clipping Mask from this layer for the blue sphere(!) in order to apply ice texture only to the sphere shape.
- Add Layer Mask to the "ice" layer. Fill it with black color. Then choose small white brush and draw ice tiles in the Layer Mask.
- Apply layer style effects to ice, use settings from the screen shot.
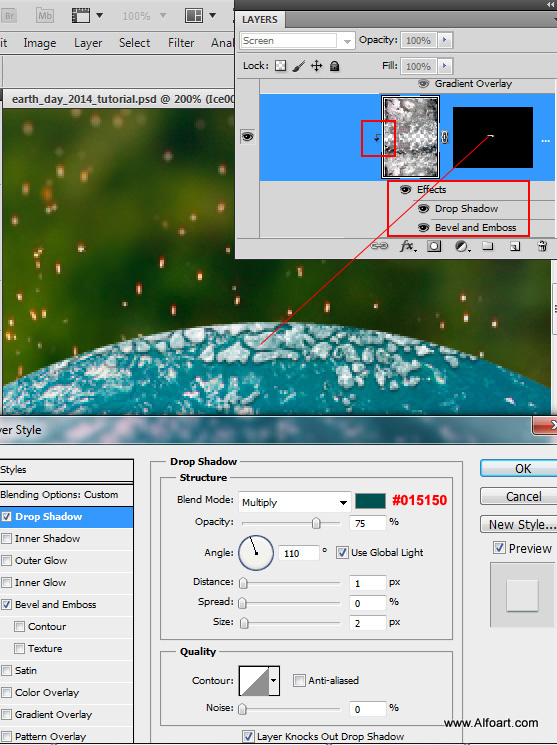
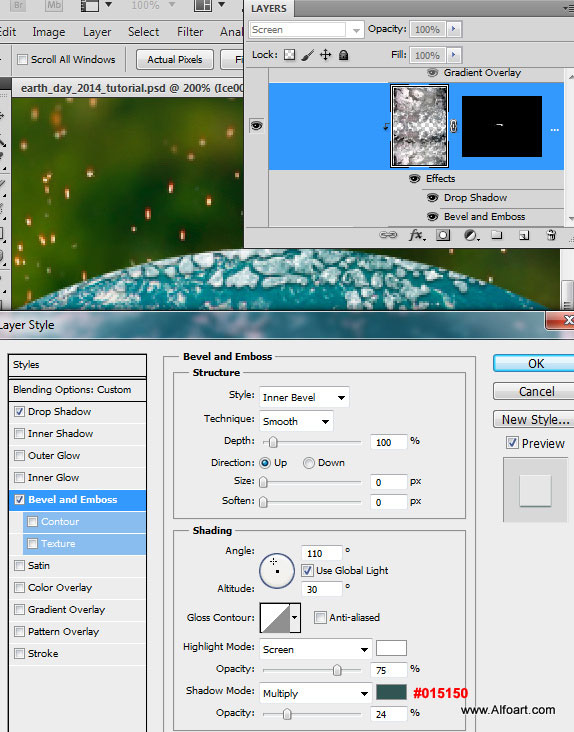
- Insert green texture(tree shape or grass) above the ice layer. Create Clipping Mask from this layer for the blue sphere as previously.
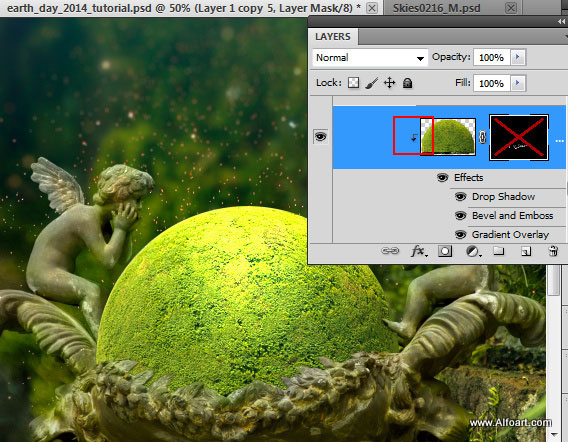
- Add Layer Mask, fill it with black color, then draw mossy curly shapes with the small white brush or you pay use preset silhouette from here.
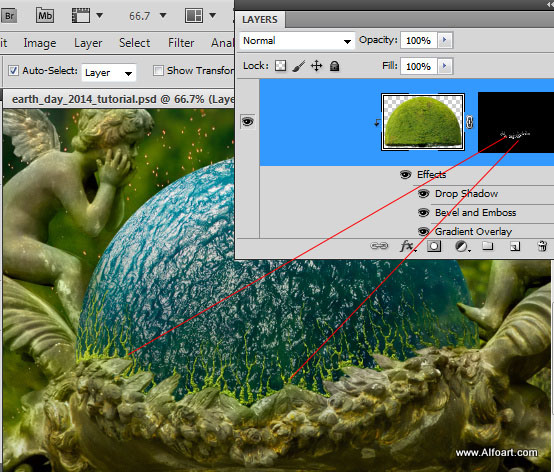
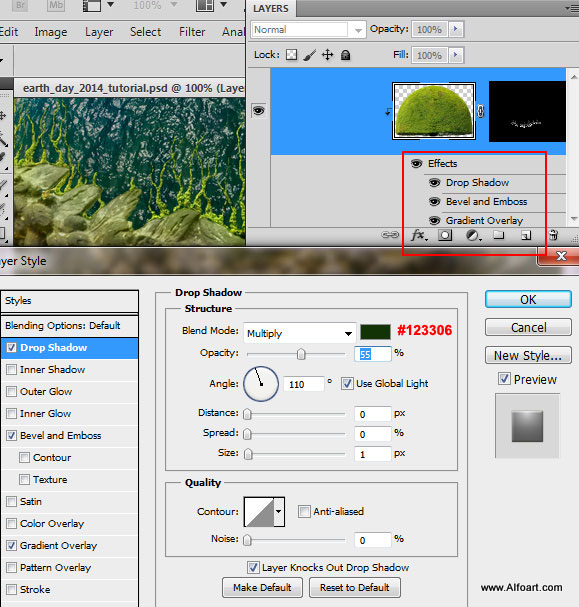
- Apply layer style effects just like in the examples:
