You may get large 9,5"x 7.5" layered and editable .psd* file of "Halloween Card Photoshop tutorial by making a payment. Put the tutorial title in "Add special instructions to seller" line of PayPal and it will be sent to you shortly.
- Make active and visible second pumpkin layer, place it above the dark one. Then place the brains texture shape above the pumpkin. We need this shape to load selection of this texture. So load selection (Ctrl + Click texture) shape thumbnail. Keep selection, return to the pumpkin layer and add Layer Mask to it.
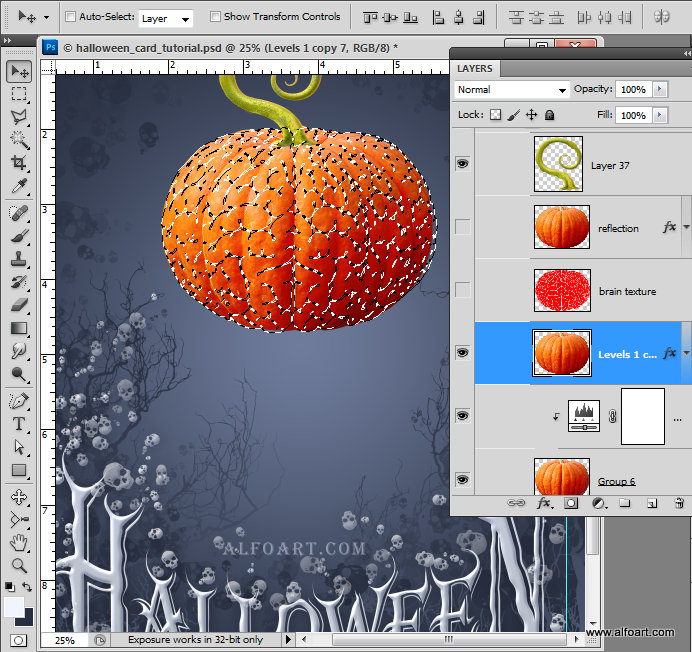
- You will get the shape with the texture contours and darker pumpkin should be visible through them.
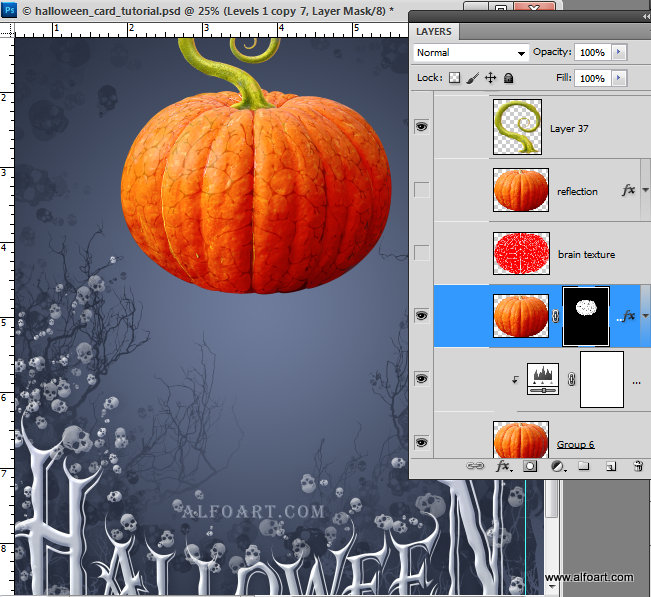
- Apply layer style effects to the masked pumpkin layer.
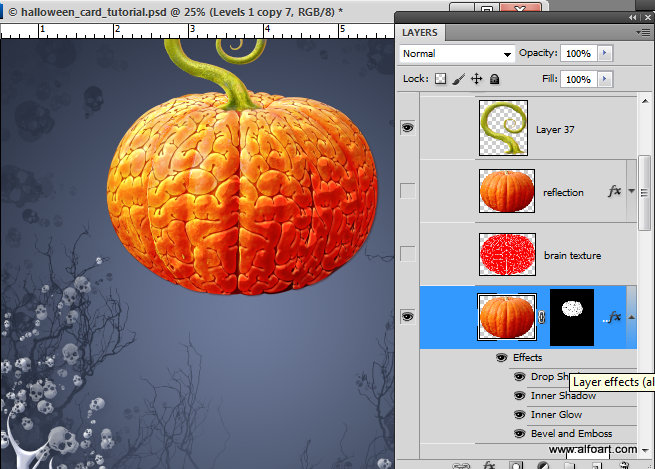
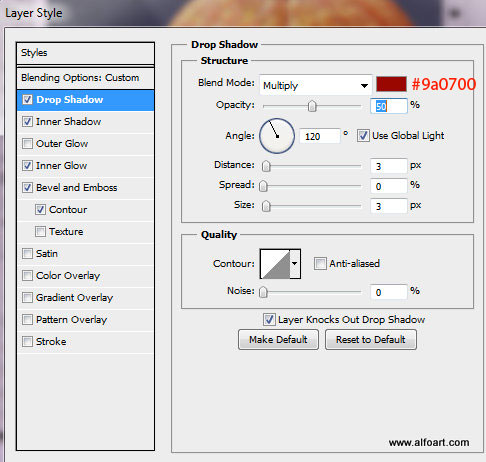
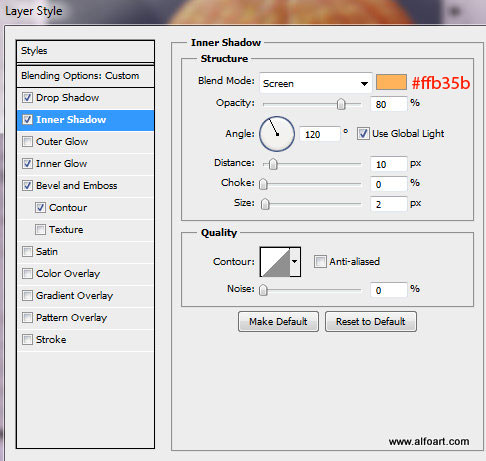
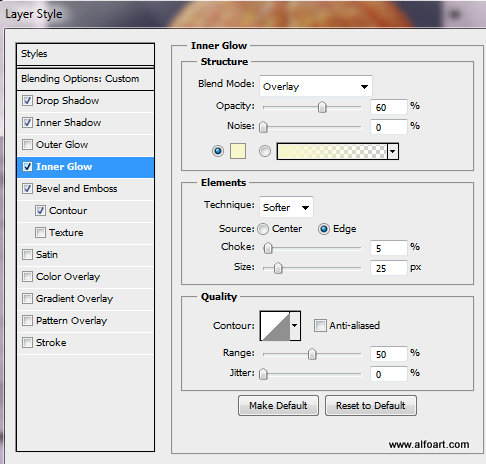
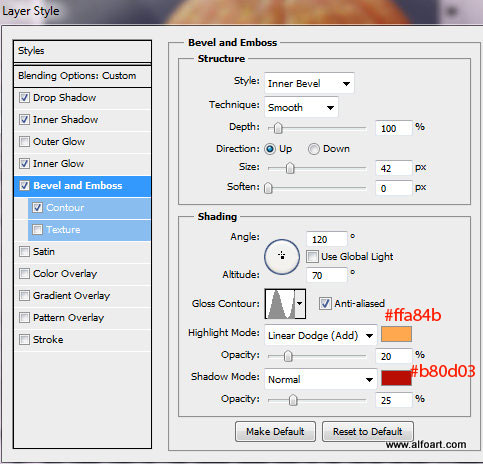
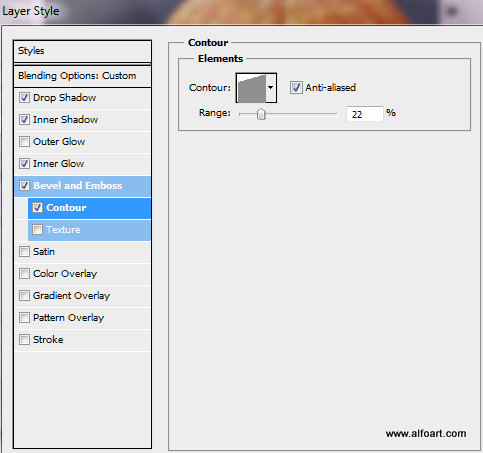
- Duplicate pumpkin layer one more time.
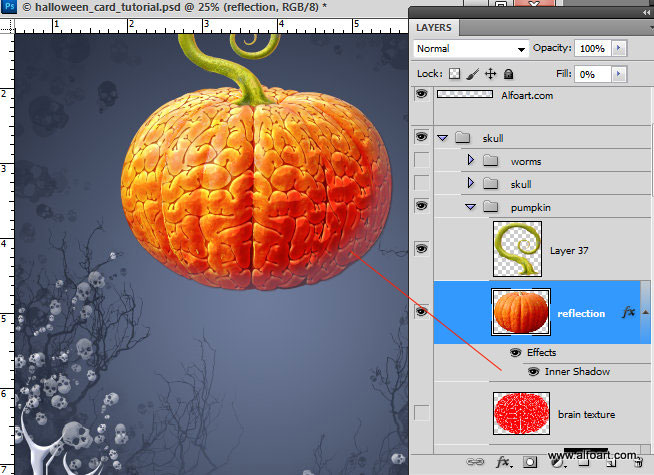
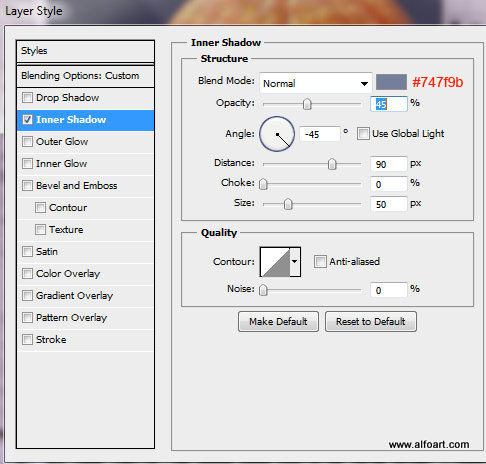
- Set Fill = 0% and apply only "Inner Shadow" effect to this layer to create background reflection:
- Insert "Skull" image.
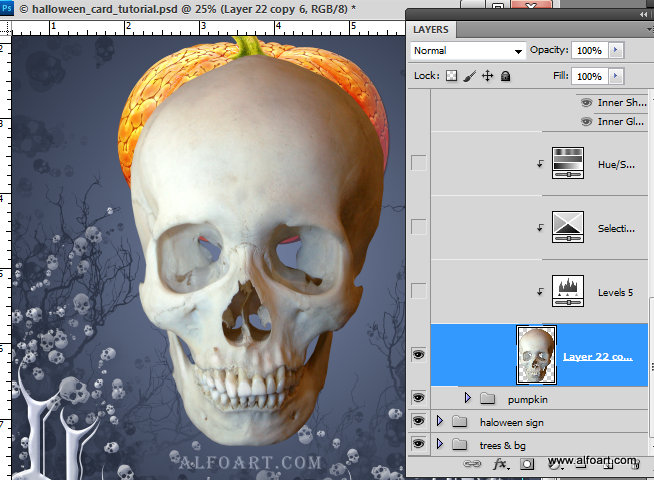
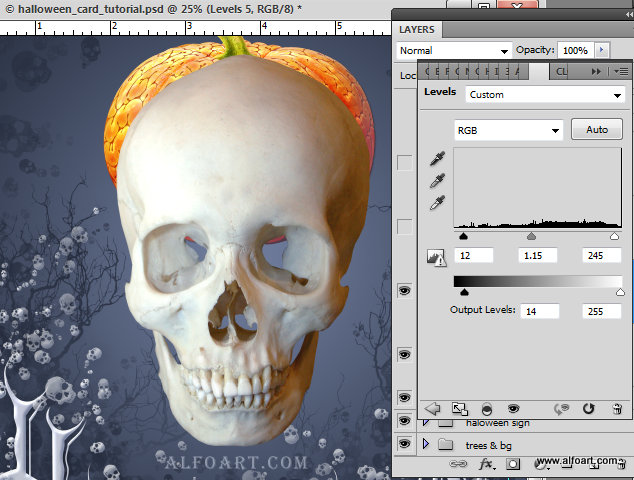
- Correct levels adjustments. You may use adjustments layers for all skull corrections. Convert used adjustment layers to Clipping Masks. Right click adjustment layer > choose "Create Clipping Mask".
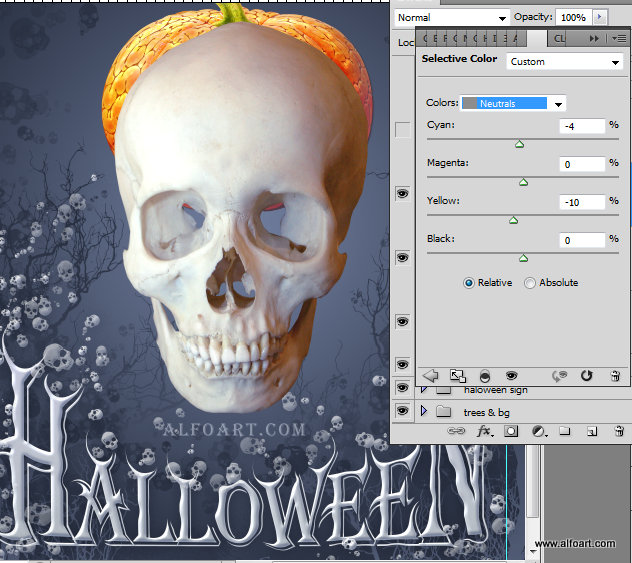
- Apply some selective color adjustments:
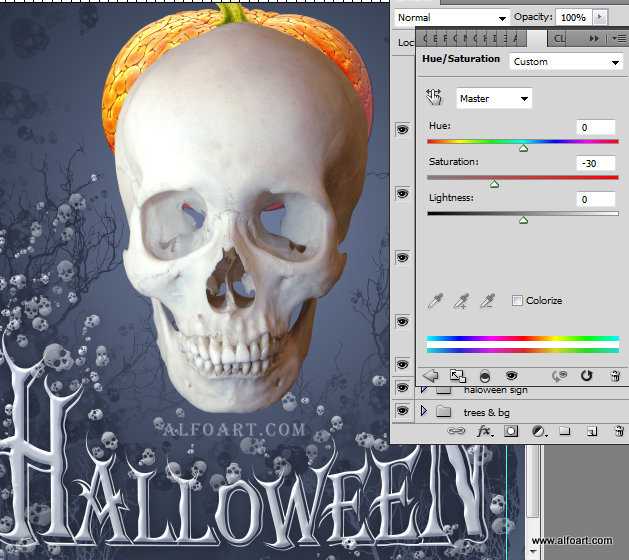
- Decrease saturation number:
- Duplicate skull layer and apply similar background reflections effects as for the pumpkin previously.
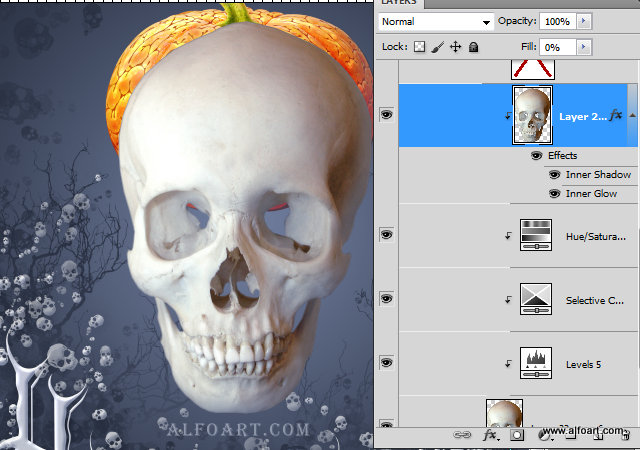
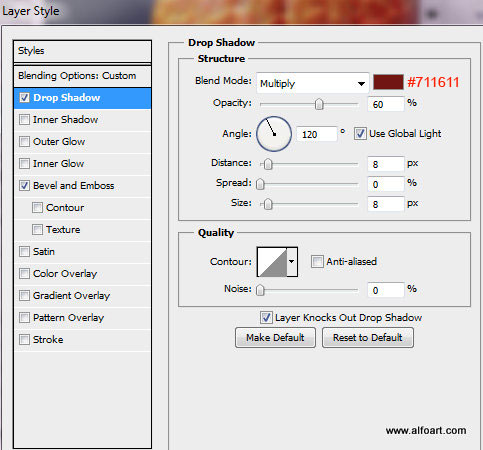
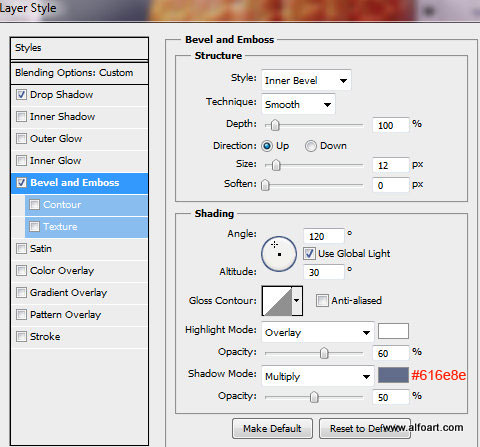
- Use settings from the screen shots below:
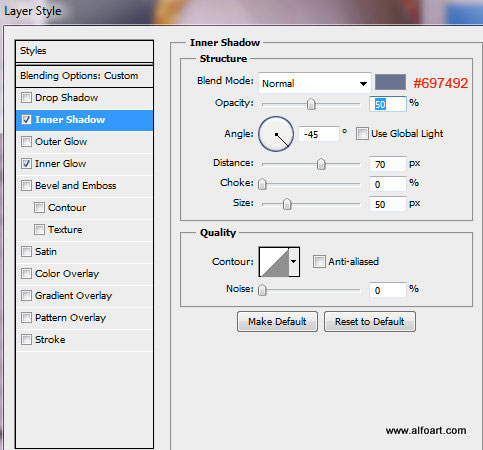
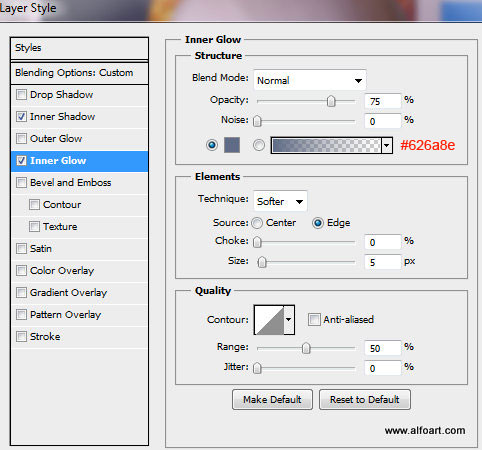
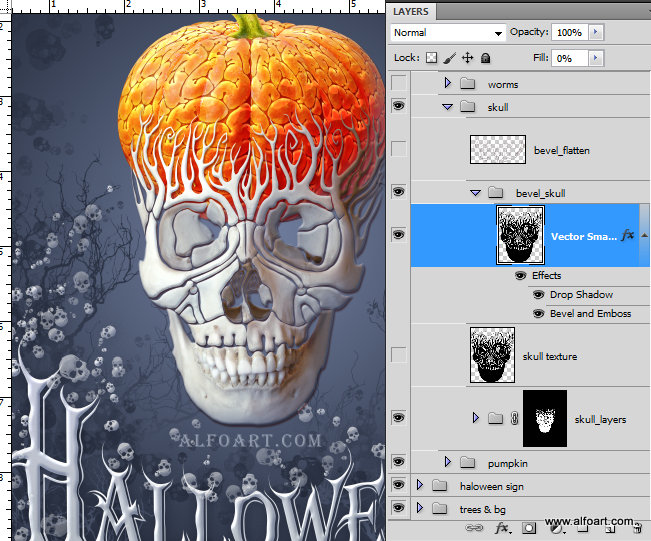
- Group all skull layers. Place skull texture shape above. Load selection for this shape, then add Layer Mask to the "Skull layers" group to extract decorative texture from the regular skull shape.
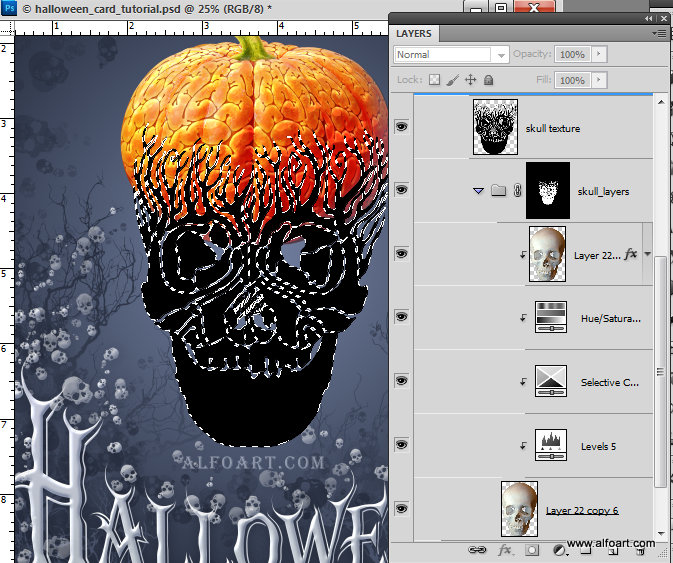
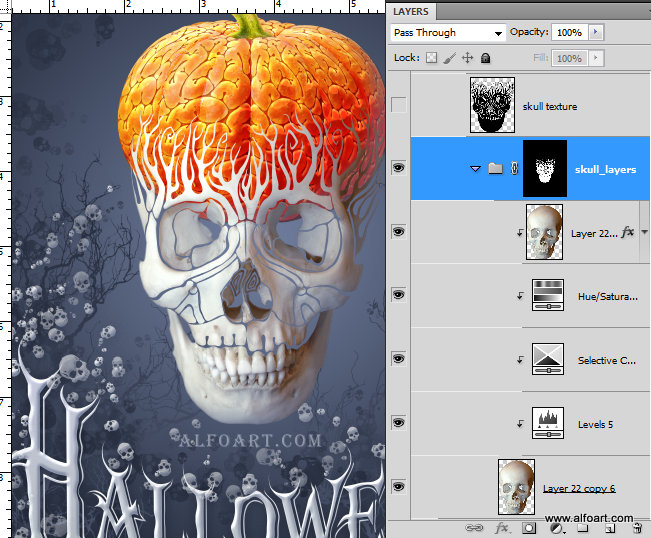
- Return to the black skull texture shape, adjust Fill = 0% and apply settings from screen shots below:
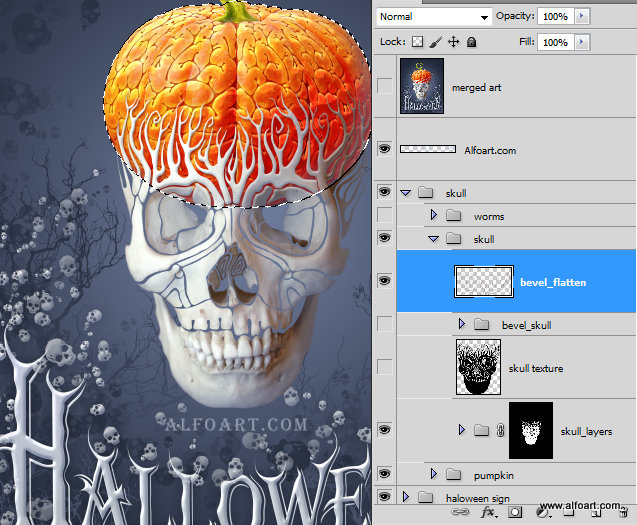
- Merge texture layer with the new empty layer and erase the bottom part below the pumpkin in order to keep emboss effect only in the pumpkin shape area.
