


| You may get .psd* file of "Shiny and glossy Frog" Photoshop tutorial by making a payment. Put the tutorial title in "Add special instructions to seller" line of PayPal and it will be sent to you shortly. |
- Next we will draw paws in a similar way.
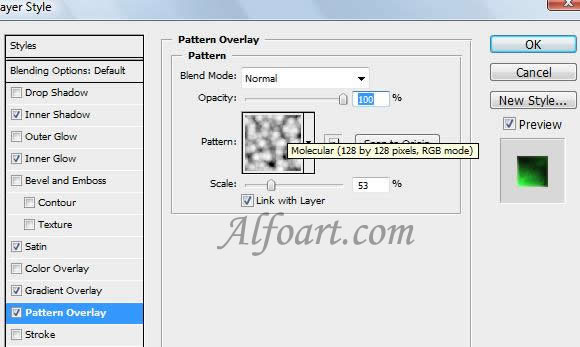
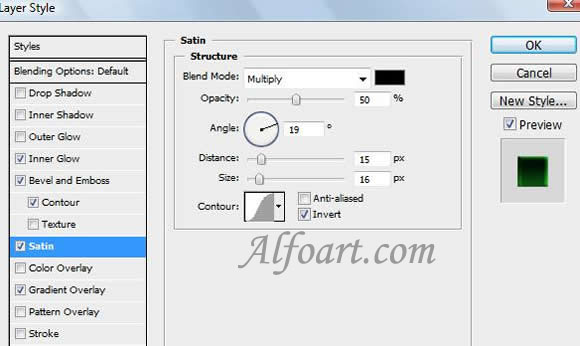
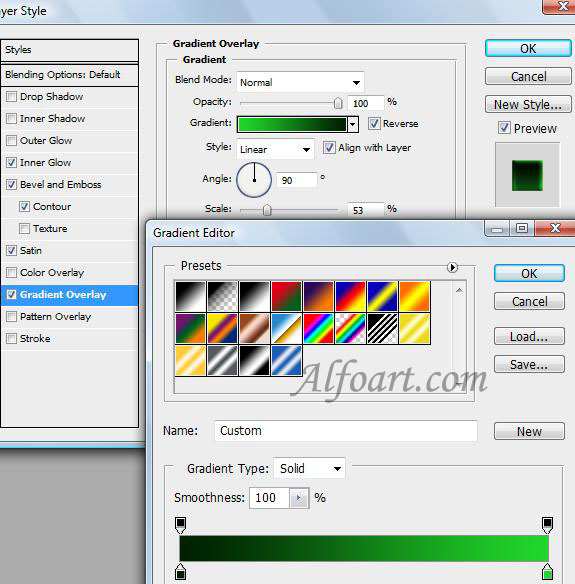
- Draw a silhouette of a paw and apply style adjustments to this layer, just like in the examples below.
- Place the layer with paws under a body layer.
- For the creation of the second paw, copy the first one and turn it (Flip Vertical), transform the paw form if it is necessary.
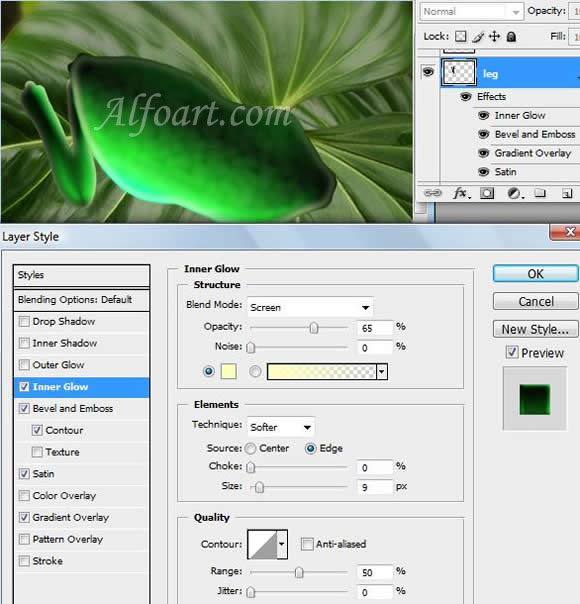
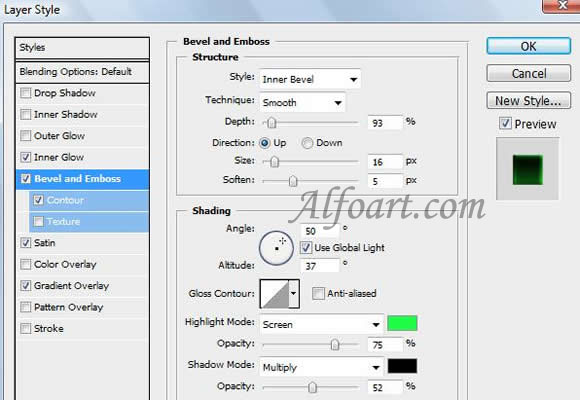
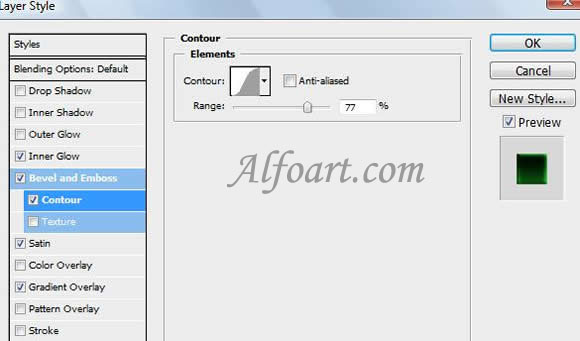
- Draw the front paw again and apply the style adjustments shown below. Soften the top edge using soft Eraser Tool. I placed this layer above the layer with the body.
