


| You may get .psd* file of "Blackberry Fruit phone" Photoshop tutorial by making a payment. Put the tutorial title in "Add special instructions to seller" line of PayPal and it will be sent to you shortly. |
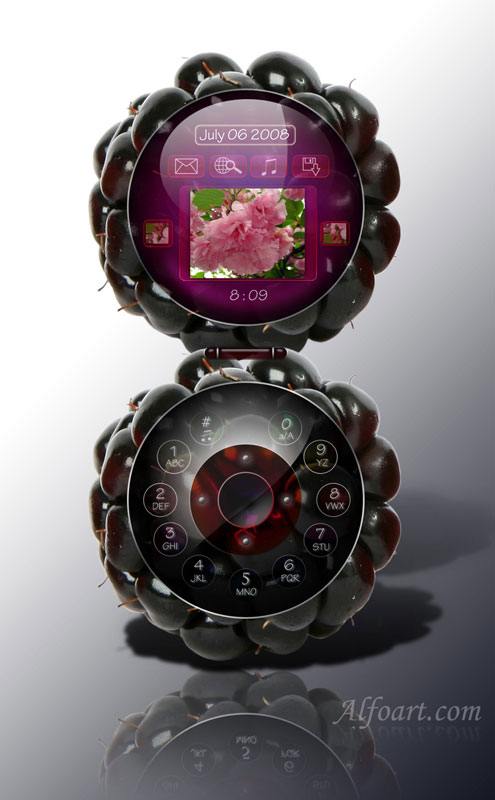
This is step by step Photoshop tutorial that teaches you how to create original and nice blackberry glossy device concept design from blackberry photo using simple tools, filters and layer style effects.
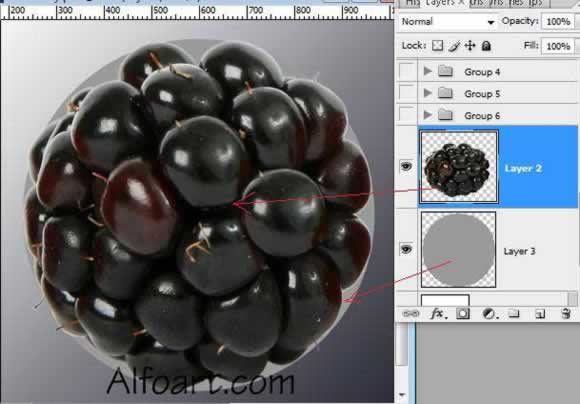
- Open blackberry image.
- Create circle, place it under blackberry layer.
- Transform blackberry so as it take the form of the circle. Use Liquefy Filter and Distort transformation.
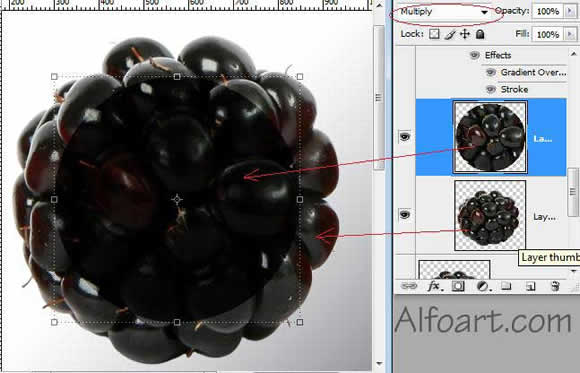
- Filter > Liquefy. Forward Warp tool

- Edit > Transform > Distort.
- Filter > Liquefy. Forward Warp tool
- Create a circle using Ellipse Tool in a new layer . Apply Multiply Blending Mode to this layer.
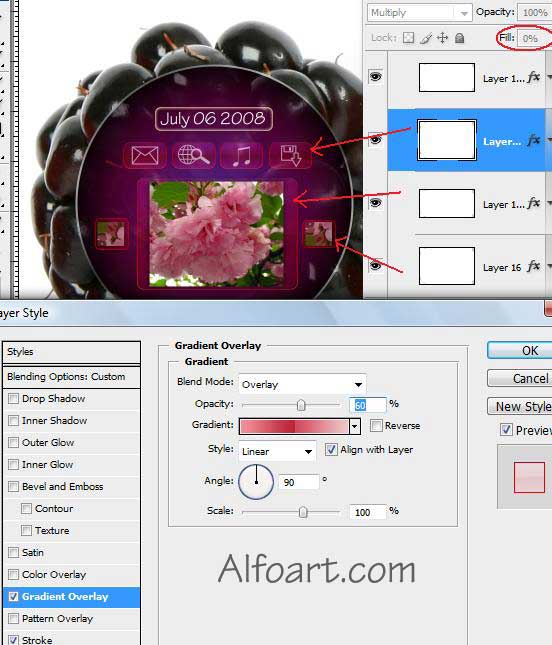
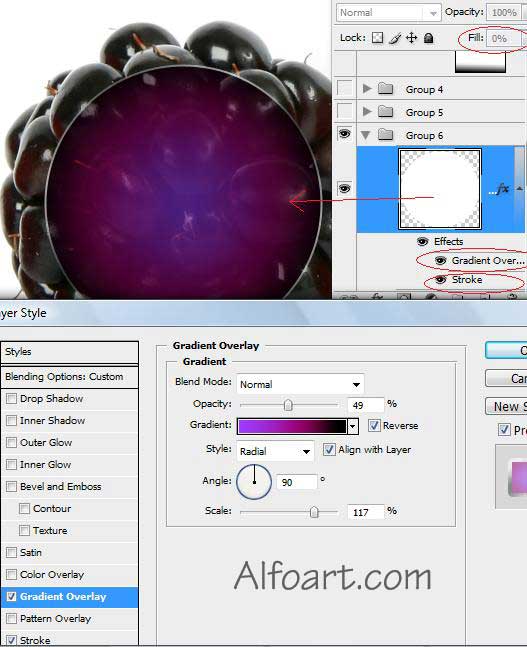
- Ctrl + Click to load selection for circle (phone display).
- Fill selection with any color in new layer. Fill - 0%.
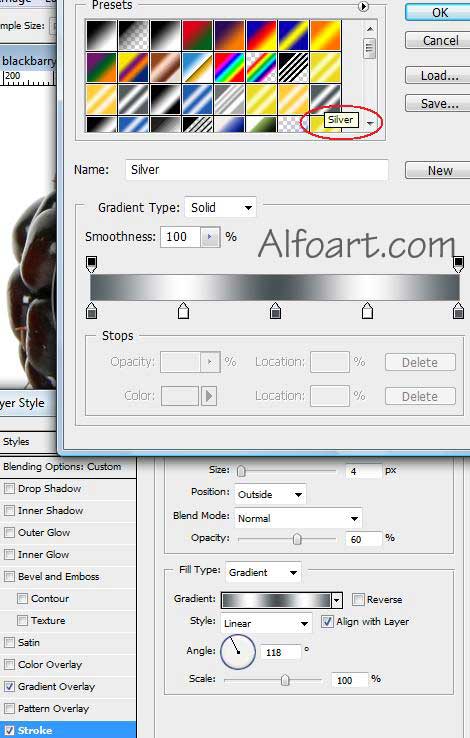
- Apply the following layer style effects to the circle.
- In order to create icons for phone display use Rounded Rectangle Tool and Preset Shapes.
- Apply Gradient Overlay and Stroke style effects to the icons.