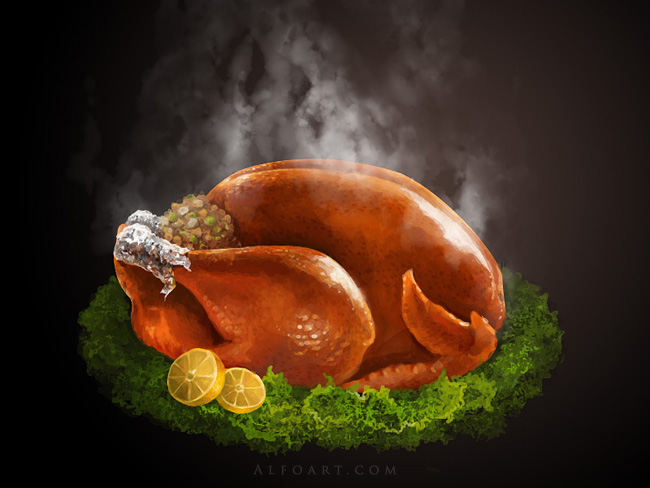
| You may get .psd* file of "Roasted Thanksgiving turkey illustration" Photoshop tutorial by making a payment. Put the tutorial title in "Add special instructions to seller" line of PayPal and it will be sent to you shortly.
|
This is step by step Photoshop tutorial that teaches you how to draw nice and realistic fresh steaming turkey from scratch.
- Used materials:
- Create a new Photoshop document 800 x 600px.
- Apply Gradient Overlay effect to the first layer with following settings.
-1.jpg)
- Create 3 basic shapes in different layers: body(1) shape, leg(2) and wing(3).
-1.jpg)
- You may use Pent Tool
 .
.
.jpg)
.jpg)
- Then make all 3 created layers invisible, we will use them just to load selections of different parts of turkey.
- Create a new empty layer.
- Choose Brush Tool with Airbrush settings. Load selection for body shape(command Ctrl+Click to invisible body layer thumbnail). Fill selected area in a new layer with color spots just like on the screen shots below.
.jpg)
- In order to simplify your work, you may save screen shot below on your computer and use the same colors by clicking to different areas with Eyedropper Tool. Just keep active Brush Tool and press it to color spots with "Alt" on keyboard.
.jpg)
- To create shadow and lighten edges between different parts of turkey, load selection for the the part inside the body, inverse selection(Select > Inverse) and process outside selected area with the dark or light color.
.jpg)
- The same action for the wing area:
.jpg)
- Add more volume and details, use the same brush but with smaller diameter, Opacity - 35% and Flow - 50%.
- Keep using colors by picking them with Eyedropper Tool(Alt-click with Brush Tool to the color spots).
- You should get something similar:
.jpg)
.gif)
- Download brushes, create a new layer and keep going to create turkey skin texture with "paint1" brush. You may play with brush size and other settings to find much convenient for you. Pay attention to Opacity and Flow settings.
- In order to hide brush traces, reduce these parameters and process painted areas with very translucent brush, choosing the close shades and colors.
.jpg)
- Add more details.
.jpg)
- In order to create textured reflections use smaller brush size but increased Opacity parameter(around 70-80%).
.jpg)
- Create a new empty layer.
- Draw small dark dots using the same brush(paint1), choose dark brown color, the size - 4-6 px, Opacity - 70%, apply Overlay Blending Mode to this layer.
.jpg)
- You should have similar result:
.jpg)
.gif)
- Create a new layer below all created turkey layers.
- Draw the stuffing with several shades(green, white, light brown and light orange). Try to use light colors on the top of stuff area and more dark colors close to the turkey body.
.jpg)
- Create a new empty layer above all turkey layers and hide turkey bottom part of the chest under the stuff. Process the stuff texture, correct details, add more dark spots in the shadow area.
.jpg)
.jpg)
- Cover bird's leg with foil. Try to create crumple texture using chaotic, various size spots with different shades from the turkey body(brown, yellow, orange), gray and dark gray original foil shade and contrast white(just in the lighten parts).
.jpg)
- Improve details:
.jpg)
- You may add torn foil effect.
.jpg)
- In order to show the second leg, just copy foil layers and place them below all turkey layers, move foiled shape little bit up and right.
- Merge second leg foil layers and make created shape darker. Go to Image > Levels, move central gray marker little right.
- Outline green leaves contour, you may use the same brash as for previous steps, just play with size and transparency.
.jpg)
- Add more green spots.
.jpg)
.jpg)
- Create natural leaves texture by drawing wavy lines, adjust Shape Dynamic setting for the Brush Tool 0% in the brushes settings palette.
.jpg)
.jpg)
- Improve green texture with small brush. Draw short contrast green color strokes(shiny in the lighten areas and dark in the shadows). Choose higher Opacity for this step.
.jpg)
.jpg)
- Process large leaves edges contour in the foreground area.
.jpg)
- Trace lemons shapes.
.jpg)
- Draw central parts of lemons with light yellow color.
.jpg)
- Process shadow areas.
.jpg)
- Add white and dark fibers with small size brush.
.jpg)
- Increase dark shadows little bit more.
.jpg)
.jpg)
- Create a new empty layer and take second downloaded brush("steam"). And try to create similar effect with this brush, pay attention to the Opacity settings on the screen shot.
.jpg)
.jpg)
- Add Layer Mask to the steam layer. Use absolutely the same brush with the same settings, but black color and process Layer mask to smooth steam effect.
- Correct left and right steam edge areas, make created effect smoother and more translucent.
.jpg)
- Here, you my see processed steam areas in the Layer Mask.
.jpg)
.jpg)
And here is the result!


