Remove photo paper texture from the old photograph in Photoshop
Here is the example of improving the old photograph with the prominent photo paper texture all over the image. Another problem of this photo it was not scanned, actually this is photo of the photo, so the paper texture is irregular because of angle and lens effect. Some of pretty simple Photoshop techniques may help you to melt down photo paper texture and keep image details.
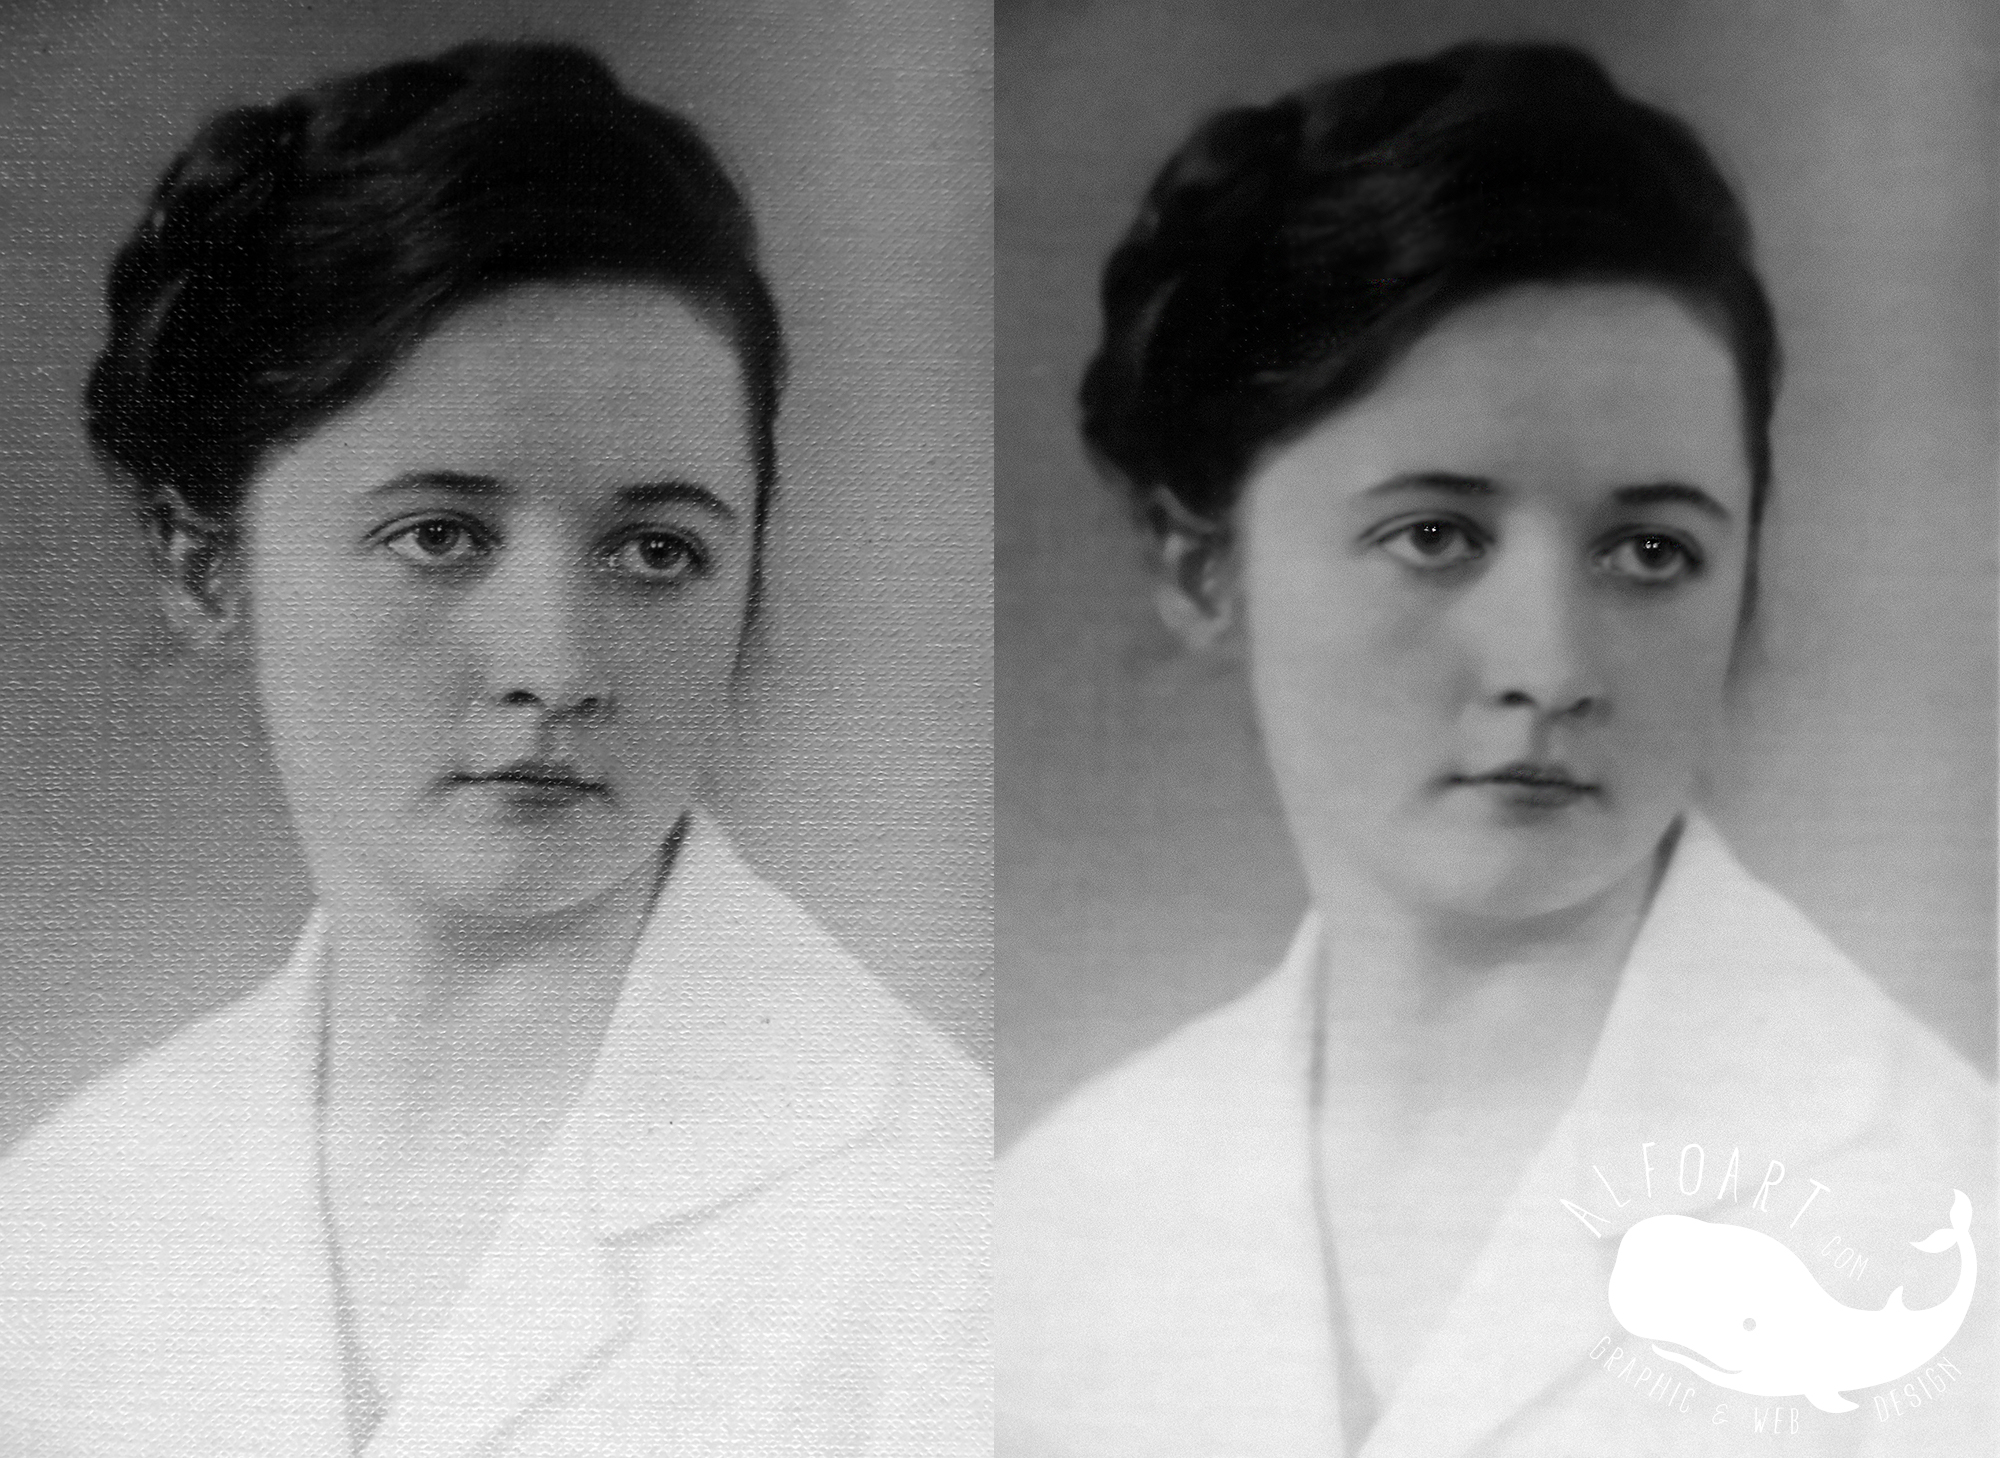
- Open photo with paper texture in Photoshop, then duplicate the first(original) layer. The original size of my photo was 2500 x 1700px, 96px/inch resolution.
- Apply High Pass filter to the duplicated layer. Go to Filter > Other > High Pass. I put 4px, you may need different value. It depends on the size of your photo and type of photo texture. You may try different numbers but you will be able to figure out the best option after inverting the created texture and after applying Linear Light Blending Mode and layer Opacity settings. Maybe you will need to return to this step and try different High Pass filter settings couple of times.
- Invert created texture. Go to Image > Adjustments > Invert.
- Apply Linear Light Blending Mode to this layer. Play with Opacity. Move Opacity marker until the photo paper texture almost disappears. Watch the video (0:27). You may apply different Opacity numbers.
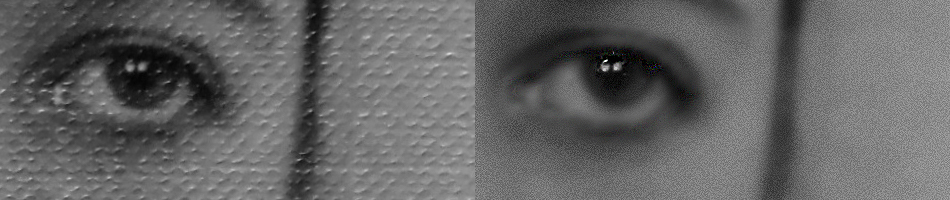
- If your photo has some original highlights (eyes or jewelry flare, for example) add Layer Mask to the gray textured layer and erase these areas. Watch the video (0:52).
- Merge the original layer with the gray textured layer (duplicate these layers before merging if you would like to keep your previous steps). You may get rid of the texture on this step and you can just apply some contrast and sharpen filter to your photo to finish the work. But I still have some traces of texture and pretty strong blurring effect. You may follow the steps below in order to improve the quality of the photo.
- Duplicate merged layer.
- Make active the top duplicated layer and apply Filter > Noise > Dust and Scratches ~ 14 (this value may depends on the size of your photo). I applied this filter to reduce texture traces and other imperfections on large areas such as background, clothes, skin. I'll use the bottom layer to return the photo details.
- Add some noise to the same layer, Filter > Noise > Add Noise > 4-6%. I added light noise in order to apply more natural old photo effect to the cleaned areas (background, skin, clothes), also sometimes noise may help to hide more prominent, larger-scale noise and imperfections from the original photo (video 1:27).
- Make the top layer temporary invisible and return to the previous layer (the layer we have got after merging gray high-pass layer with the original photo).
- Apply Sharpen filter to this layer, pay attention to details such eyes, lips, hair do not worry about other areas, we will cover them with the top layer (video 1:56).
- You may see some small light dots on the dark spots of the photo, remove them with the Spot Healing Brush Tool
 (video 2:15)
 - You may process some small details such eyebrows, eyelids, etc... with the Sharpen Tool
 (video 3:20)
 - Make visible the top layer again, play with Opacity, make it 70-80%.
- Add Layer Mask to this layer. Choose soft round translucent Brush Tool (Opacity 30%, Flow 50%). Process eyes, lips, hair and other details (video 5:48). You will get contrast and sharp small elements and clean large areas.